You might be curious about how to find floor joists beneath a tough hardwood floor if you need to remove old subfloors or fix a squeak. Many times, you’ll have to stop a squeak because the wood has expanded and contracted from humidity. Since the nails in the floor joists stay put, you’ll get some irritating noise. But we’ve thoroughly researched how to find hidden floor joists, no matter what you need them for.
In order to locate the floor joists under hardwood floors, you can use a specified tool called a stud finder. However, the stud finder won’t work on every occasion. Fortunately, you can resort to ordinary hand tools using some simple tricks. So, these are the basic steps to find your floor joists:
- Use a stud finder
- Use hammers or magnets
- Measure the space between joists
It can be easy to find the floor joists under hardwood floors, whether you’re willing to invest in a stud finder or simply use common household tools. But you can keep reading to learn how to use the stud finder and tools correctly, as well as the direction and structure of the floor joists you’re looking for.
![Wooden Interior with Funiture and Fireplace, How To Find Floor Joists Under Hardwood [Various Methods To Try]](https://homedecorbliss.com/wp-content/uploads/2021/08/How-To-Find-Floor-Joists-Under-Hardwood-Various-Methods-To-Try-1.png)
How do I find out where a joist is?
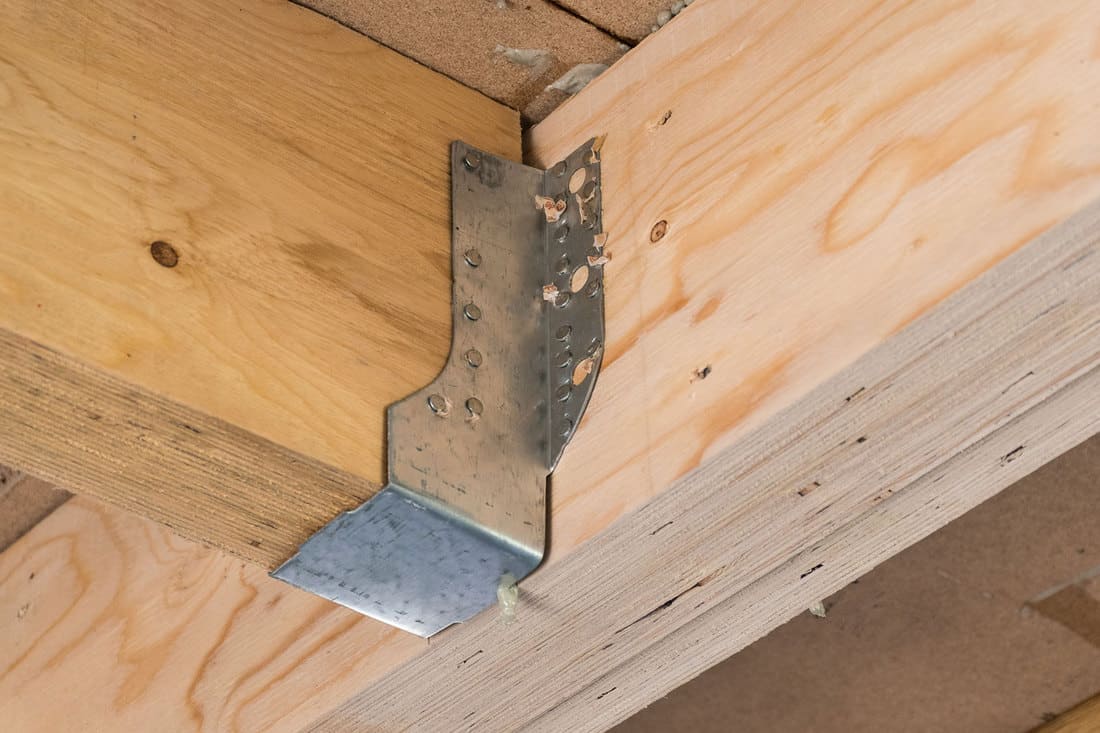
Joists are horizontal boards that help increase the amount of weight that open areas can support. This makes them a common and invaluable addition to a floor’s framework. Although most of them are made of wood, it is generally a simple process to identify their position.
Stud finders will be able to detect joists through the floor by sensing their density or finding their nails. Sometimes your stud finder just isn’t working, or you may want to save money on an extra device. In that case, you can use a hammer to listen for hollow flooring. Or, you can use specific magnets to find the nails yourself.
Can you use a stud finder to find floor joists?
We may include affiliate links and curated AI content to highlight top design styles.
Stud finders are handheld tools that have been specifically designed to help locate wall studs. They can do so through various methods based on what kind of stud finder you decide to use.
Some stud finders are electronic, and these are built to locate the edges or center of a wooden stud. This is achieved by showing you the changes in density between the wall and the stud. Other stud finders are magnetic and will help pull you towards the nails that are inside any structural framework.
So even though stud finders are often used for walls, they are still the best option when you want to find floor joists quickly and effectively. These devices are especially useful if you are more of a beginner in home improvement and do not feel completely confident in your ability to quickly apply regular hand tools instead.
How do I operate an electronic stud finder?
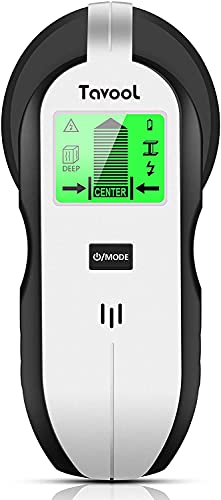
Click here to see this electronic stud finder on Amazon.
While it may be easy to use an electronic stud finder, there are still some tips that will help you avoid issues. There are actually more than a few situations that will result in an error reading.
For example, you have to make sure that you only activate the tool once it is correctly positioned on the floor. As soon as you press the button, the stud finder will begin detecting shifts in density right away. If you trigger the stud finder before it’s placed on the floor, then everything beneath the hardwood will appear different to the device. So, you won’t end up with a proper reading.
A similar problem can actually occur if you unknowingly start right on top of a joist. You would have to restart with the device further away. Otherwise, the stud finder will think that everything is less dense than the starting point, and it won’t sense another joist.
Applying the Device
Position the electronic stud finder against the floor so that it is parallel. You want the device to point directly up and down for an even reading. Once the device is pressed against the floor and level, you can activate it. Slowly slide the device left and right until it finds one of the joists.
Some stud finders will specifically detect either the outer edges of a joist or the exact center of a joist. Keep in mind which one you have. If your stud finder only reveals the outer edges, then you’ll have to move the tool back and forth until you find both outer edges of the joist. Then, you’ll know which direction to consider on either side of the first edge.
You can mark your findings using painter’s tape. The popular company 3M advises that Scotch painter’s tape can safely be used to protect hardwood floors without damaging the finish. You can also read the post Does Carpet Tape Damage Wood Floors? if you plan on using something else.
How do I operate a magnetic stud finder?

Click here to find this magnetic stud finder on Amazon.
A magnetic stud finder won’t require batteries because it will simply rely on the attraction of the metal nails beneath the hardwood floor. This process is more straightforward and often less expensive than an electronic stud finder.
Most of the time, all you need to do is slowly run your magnetic stud finder across the floor until you feel the pull of a nail. This applies to stationary magnetic stud finders.
There are moving magnetic stud finders that have a more unique design than that. A rare earth magnet, usually known as a neodymium magnet, is housed in a neutral position. When the stud finder hovers over any metal, the special magnet is instantly attracted and makes a noticeable thud noise.
These magnets are also able to detect deeper nails, which may help with hardwood floors that are especially thick and include an underlayment.
Bear in mind that these magnetic stud finders only locate the nails and not the floor joist itself. The nail won’t indicate where the edges or center of the joist is. It only gives you a general guide. You would still have to use a hammer in addition to the stud finder. But it can still save you lots of time and guesswork.
Which way do floor joists run?
Specialists such as Your Own Architect agree that floor joists are more likely to run parallel with the shorter dimension of a room. This way, they wouldn’t need to compensate for supporting a broader distance. For example, some buildings may include the addition of load-bearing walls, which can help break up the span of the joists. You can read the post How To Tell Which Way Floor And Ceiling Joists Run for even more details.
You may have to rotate your stud finder at ninety degrees if you aren’t lined up with the direction of the floor joists. This is because you might have found the joist running longways.
That wouldn’t alert the device properly all the way across the room because everything would appear to have the same density. This also wouldn't help you find any edges or other joists. Likewise, it would be impossible for you to find a difference in sound using your hammer. There would never be a hollow noise if you continued down a level path.
How can I find a joist without a stud finder?
If you don’t have a stud finder and do not want to invest in one, there are simple alternatives. Since you know that magnetic stud finders use ordinary magnetism to find the nails in your floor joists, it’s possible to use magnets yourself. It’s more ideal if you can also use one of the rare earth magnets that the stud finders have.
Once you have found the nail, you can tap the hardwood floor with a hammer and listen for hollow spaces. Hollow areas will sound deeper and louder while a solid object will sound muffled. Place a cloth on the floor’s target area before you tap it with a hammer to avoid causing any damage to the wood.
This method will be necessary even if you use a magnetic stud finder. But if you know the distance between floor joists, you can use that instead. From the edge of your floor, measure the standardized distance between joists. There, you can use the hammer to guess where a solid object is.
Measure the space between joists
Once you have located the first floor joist, your job becomes much smoother. You just need to identify the standard distance between your home’s floor joists. Measure this distance from the location of the first floor joist, and you will certainly find the second. Repeat this process until you find all of the floor joists. Again, you can mark the floor using painter’s tape to save your progress.
How far apart are floor joists?
Specialists like Niva Floors advise that floor joists are usually spaced sixteen inches apart on center, sometimes shortened to “OC.” This means that the distance is measured between the center of each joist. Sixteen inches will respect a typical building code and provide enough support. However, it is still possible for some floor joists to measure either twelve or twenty-four inches instead.
Do floor joists line up with studs?
Although it is beneficial to line up floor joists with the wall studs, it is not actually a requirement. But experts such as What Blueprint agree that aligning these two structural support fixtures will make repairs easier. So, your joists are still likely to be lined up since wall studs are also typically spaced sixteen inches apart. But it isn’t a guarantee.
Summary
![Wooden Interior with Funiture and Fireplace, How To Find Floor Joists Under Hardwood [Various Methods To Try]](https://homedecorbliss.com/wp-content/uploads/2021/08/Wooden-Interior-with-Funiture-and-Fireplace.jpg)
It can be fairly easy to find floor joists under your hardwood, but the process still needs to be completed correctly. It will already be a little time-consuming, so it’s best to learn about the best way to find your joists. Now that you know how to use hand tools and stud finders properly, you’ll quickly be able to fix squeaks or finish any other handiwork that demands a joist.