Are you sick of hearing the floor creak when you get out of bed? Can you hear every move someone makes in the room above you? Or are you getting ready to sell your home and want to impress potential buyers? If so, you might be wondering how to fix the squeak under the carpet. We've researched this topic thoroughly and have put together this handy guide for you.
Follow these steps to fix the squeaky floor under your carpet:
- Find the squeak
- Locate the faulty joist
- Insert screws along the edges of the area
- Drive screws in the rest of the area
- Break off the screw heads
This is a relatively simple project that almost anyone can do. For more details on each step, plus answers to common questions about squeaky floors, please continue reading!
![Family eating together at house with a wood flooring, How To Fix A Squeaky Floor Under Carpet [5 Steps]](https://homedecorbliss.com/wp-content/uploads/2020/12/family-eating-together-house-with-a-wood-flooring-How-To-Fix-A-Squeaky-Floor-Under-Carpet-5-Steps.png)
Are Squeaky Floors From A Structural Problem?

We sometimes add affiliate links and content that was curated and created by our team with the help of advanced ai tools to help showcase the best design styles.
If you have squeaky floors, don't be alarmed. This is not a sign of a bigger structural problem that will send your house toppling to the ground.
Actually, it simply means that the subfloor isn't properly connected to the floor joists. Joists are wooden beams that run underneath your house. They run parallel to each other for the entire length or width of your home. Their purpose is to support the weight of the home, keeping it sturdy and providing space for a crawlspace or basement. The subfloor is wood sheeting underneath the finished floor.
Squeaky floors might happen if the subfloor gets wet and warps, or if a piece of furniture has put pressure on one spot for too long.
How To Fix A Squeaky Floor Under The Carpet
Necessary materials for fixing squeaky floors:
- Hammer (to find joists)
- Stud finder (optional)
- String or yarn
- Electric drill
- Floor repair kit (optional)
- Drywall or deck screws (if not using a kit)
- Pliers (if not using a kit)
1. Find the squeak
Walk over the carpet until you figure out the edges of the squeaky area. Mark it off with string or yarn. Based on how homes are built, it's likely that the squeak lasts the entire length of the room.
2. Locate the faulty joist
After you've found the squeak, the next step is to find the joists in the squeaky area.
How Do You Find Floor Joists Under Carpet?
There are a couple of methods that you can use. The good news is that the vast majority of homes have floor joists that are spaced 16 inches apart. That means if you find one joist, you can easily figure out where the rest are.
If your home was built in the 19th century or is an unusual format, it might be different. If that's the case, you'll need to use one of these methods to find each joist in the squeaky area.
Stud finder
The best option is to use a stud finder like the one below. A stud finder is a device that detects wood beams (known as "studs" when they're in walls) behind surfaces. Turn the stud finder on and run it slowly over the floor. Most stud finders use lights or noises to tell you when it is on top of a joist. Mark the spot with a string or tape measure.
Click here to view this stud finder on Amazon.
Hammer
If you don't have a stud finder, you can use a hammer to find the joists. Tap the head of the hammer on the floor in a line running parallel to the direction of the joists. At some point within 16 inches, you should hear the noise change. When you tap the carpet above the joist, the sound should be thicker and more solid. When you're tapping away from the joist, the sound will be more hollow.
This method might take some trial and error. When you move on to the next step, it will quickly become clear whether or not you're hitting a joist.
Joist finding tool
The third method is to use a joist finding tool that comes with a floor repair kit. The kit shown below includes one of these tools.
Click here to view this kit on Amazon.
The joist finding tool is a long screw with very few threads. To use it, drill it down into the carpet until the threads are through the subfloor. This tool will not hurt your carpet!
Once the threads are through the subfloor, they will either attach onto a joist -- stopping and holding solid -- or will shoot through and not be attached to anything. If you've missed a joist, move over and try again.
3. Drive screws along the edges of the area
This is where the process changes based on whether or not you're using a kit. A kit like the one below can make the process go more smoothly but will cost more. If you're handy and already have the other materials, you might want to go without the kit.
Click here to view this kit on Amazon.
Using a kit
Put the kit's attachment into a drill and put one of the special screws on the bit. Push the tripod firmly into the carpet on top of a joist at one end of the squeaky area. Stand as close to the tripod as possible so that your body weight can lower the subfloor to touch the joist. Then, put the screw through the hole in the tripod and drill as far as you can.
The tripod is designed to stop the screw at the right point. Move to the other end of the squeaky area on the same joist and repeat this step. Then, move to the ends of the other joists in the squeaky area.
Without a kit
If you've opted not to use a kit, find a set of drywall or deck screws. Make sure they are at least 3 inches long with at least an inch without threads at the top like the ones below.
Click here to view these screws on Amazon.
Drive the screw into the carpet on top of a joist at one end of the squeaky area. Screw it down until the top of the screw touches the top of the carpet. Do the same thing at the other end of the squeaky area on the same joist. Then, move to the other joists and sink screws into each end of the squeaky area.
4. Drive the rest of the screws
Once you have screws at each end of the same joist, wrap a piece of string or a chalk line around one of the screws, then stretch the string to the nail at the other end of the same joist. This creates a line for you to follow so that you don't have to find the joist each time.
Go along the length of the string, driving screws into the floor every 8 inches. When you finish one joist, move your string to the next joist and do the same thing.
5. Break off the screw heads
This step is where the difference between a kit and regular screws will become obvious. The specially made screws in a kit are designed to break off easily. Plus, the kit comes with a tool (probably on the tripod) that fits onto the head of the screw. Snap it back and forth to break off the head.
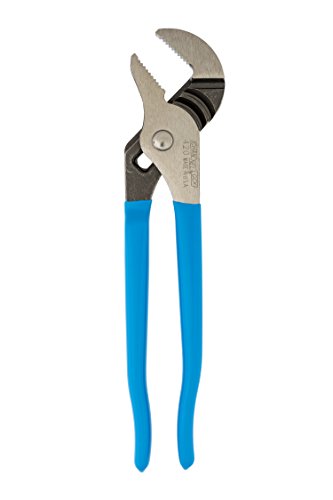
Normal deck or drywall screws, on the other hand, are designed to be solid and will be harder to break. Using a pair of pliers -- preferably channel lock pliers -- grip the head of the screw. Reach the pliers as close to the subfloor as you can. Jerk the pliers back and forth until the screw head pops off.
Click here to view these pliers on Amazon.
Do this with all of the screws in the floor. Finally, walk back over the formerly squeaky area. Make sure you haven't missed anything. If you have, complete this process anywhere a squeak remains.
The squeak is gone! Looking for more ways to help your bedroom feel peaceful? Check out this article for ideas!
Will Carpet Installers Fix Squeaky Floors?
Yes, most professional carpet installers will fix squeaky floors. In fact, many flooring companies will fix any problem with the subfloor before they install the flooring. This might include completely reinstalling the subfloor.
Let the installers know about any squeaky areas before they begin their work.
How Much Does It Cost To Fix A Squeaky Floor?
To fix a squeaky floor yourself, the only cost is for materials. A kit like the ones mentioned in this guide cost anywhere from 20 to 30 dollars. If you're attempting the project without a kit and need to buy the screws, expect to spend up to 10 dollars. The whole process should take less than two hours.
Read this article for more cost estimates related to carpet.
Do Floors Squeak More In Winter?
Think your floors are squeakier in the winter? You aren't crazy! The cold, dry weather in winter causes materials like wood to shrink. This makes the gap between the subfloor and the joists even wider, giving more room for the floor to move.
In Closing
To fix a squeaky floor under the carpet, you'll need to find the right joists, insert screws to attach the subfloor to the joists, and then break off the screw heads. The squeakiness is caused because the subfloor isn't attached to the joists. This is a relatively simple repair that costs less than 30 dollars and takes only a couple of hours to complete.
Hopefully this guide has helped you feel confident that you can fix your own squeaky floors. Good luck!


