Sometimes shower bases can begin to look worn after ten or more years. And if you are searching for a way to make your base look brand-new without replacing it, painting it is a great option. We have looked into how to paint the shower base, and in this post, we will go over it.
Here are the steps to paint a shower base:
- Remove the shower hardware
- Clean the base
- Repair any damage
- Apply painter's tape
- Use sandpaper to scuff the base
- Apply a primer
- Mix epoxy solution and apply
- Scuff the base and apply an additional coat
Before painting your base, it's a good idea to make a list of all the equipment, tools, and other items that you'll need for the job. Every shower base is different. And the size and material composing your shower base will play the biggest part in how you paint it.
Steps To Paint A Shower Base
Remember that every paint job is only as good as the preparation job. To paint your shower base, you'll likely need to purchase an epoxy painting kit. These kits require extensive preparation to be effective, so be ready to do an A+ job on prepping the base.
It's also worth noting that painting a shower base is permanent. So carefully consider the color and the texture that you want the base to have before moving forward with your project.
We may include affiliate links and curated AI content to highlight top design styles.
Things you'll need:
- Putty knife
- 200-grit sandpaper
- Cleaning sponge
- Paper towels
- Epoxy paint kit
- Paint sprayer
- Drop cloths
- Painter's tape
- Caulk and grout
1. Remove the shower hardware
If you have any metal hardware around your shower base, be sure to remove it before applying any paint products. Next, use a screwdriver to unscrew and remove the drain from the base.
2. Clean the base
Next, take a bathroom cleaner or an abrasive all-purpose cleaning solution and thoroughly clean the shower base. Apply rust removal on any areas that may have mineral stains. Products such as CLR, Lime-A-Way, and Comet are great options for cleaning old stains and stubborn dirt on the base. Be sure to thoroughly rinse and dry the base after the cleaning.

3. Repair any damage
If there are any chips or cracks on the base, take a spackling compound that's appropriate for the base's material and apply it to these areas. You can also use a fiberglass resin kit to make repairs if the base is made of acrylic or porcelain. To do this, start by scuffing the area around the damaged sections with your sandpaper. Next, combine your spackle or resin solution according to the directions.
Then spread the compound on the damaged areas using a putty knife or the applicator that came with the kit. Scrape off any excess with your putty knife and allow the solution to try for the recommended drying time. Be sure to apply any additional coats as needed, especially over large cracks or dents.
After the solution has dried and set, sand it down with sanding paper or a handheld buffer so that the repairs are even with the rest of the base's surface.

Read more details about this fiberglass repair kit on Amazon.
4. Apply painter's tape
Next, apply a layer of painter's tape to the perimeter of the shower base. If there is any hardware around the base that you couldn't remove, be sure to cover it with tape at this time.

Find painter's tape on Amazon.
5. Use sandpaper to scuff the base
Use the sandpaper to gently scuff the entire shower base. Pay special attention to the edges of the base as well as the area around the drainage hole. Ensure that the entire base surface is scuffed so that the paint will have a solid bond.
6. Apply a primer
Next, take the primer, gently agitate the container, and apply it to the base. If you are using a paint sprayer, be sure that the primer is thin enough to where it doesn't clog the sprayer. If you are using a foam brush or roller (avoid using a paintbrush for the base), make sure to apply a thin coat of paint for the primer so that it doesn't peel.
After the first coat of primer dries, apply an additional coat. Also, be sure to don a respirator mask and appropriate painting equipment before this step.
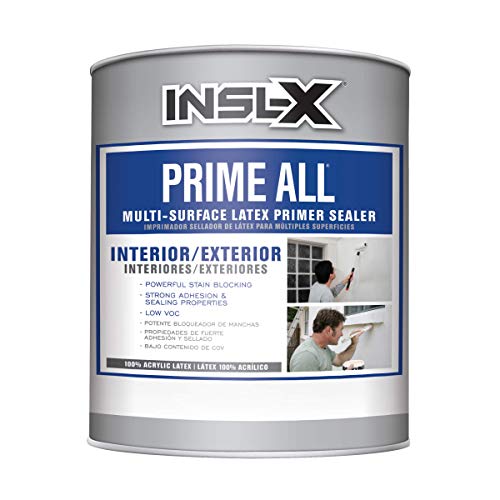
Check out this multi-surface primer on Amazon.
7. Mix epoxy solution and apply
Now it's time to mix your paint solution. If you have an epoxy solution, be sure to mix the ingredients in accordance with the label instructions. Next, apply the first coat to the shower base. Be sure to start in the same area in which you applied the primer.
Apply short, even coats to avoid creating roller or stroke marks. Note that the epoxy or resin solution will be a bit thicker than your typical paint, so you only need to use a thin application for each coat.
8. Scuff the base and apply an additional coat
Wait for the first coat to dry for the recommended drying time, and then lightly scuff the base using your sandpaper. Take your cleaning cloth and wipe away any accumulated dust, then apply another coat of paint.
Finally, let the final coat of paint dry they recommended drying time. Once it's dry, remove the painting tape and re-attach the shower drain. Wait 24-48 hours before using the shower again.
What kind of paint to use on a shower base?
You typically need to use epoxy paint for a shower base (with the exception that the base is made of concrete). The typical epoxy kit will come with a hardener and epoxy resin, cleaning supplies, application tools, and in some cases, a primer.
The reason is that the epoxy paint will form a strong, solid bond on the shower base that will not peel or crack from water damage. There are some waterproof paints that can be used for the surface, but they typically won't hold up as well or as long as the epoxy resin.
Can you paint a concrete shower base?
You can paint any type of shower base. If the base is made of concrete, it will need to be in good condition before it can be painted. This means that the base should be clean, free of damage such as cracks, dents, and holes, and it should be coated with a suitable primer before paint is applied.
The most common paint to use for a concrete shower base will be epoxy paint, masonry paint, or an acid-based stain with a color hardener.
When looking for paint for your concrete shower base, try to find a paint formulated for masonry or concrete. These paints are much thicker and way more durable than your typical interior or exterior wall paint.
They also contain special binders that allow them to contract and expand with the concrete surface. Concrete paint differs from epoxy paint as it is much easier to apply, and it typically costs less per square foot. You often see these paints used for areas such as garage floors and public walkways.
Can you resurface a shower base?
Yes, you can resurface a shower base. To do this, you will need to purchase a resurfacing kit which includes special paint designed for acrylic (and porcelain) tubs and showers. The paint contains a bonding agent and a primer that must be applied in several layers before it cures and hardens.
Once the solution hardens, you can sand it down and apply a finishing coat to smoothen the surface. Before resurfacing your shower base, be sure to thoroughly clean the base, remove any caulk around it, and repair any damaged areas.
Can you paint a shower drain cover?
Yes. You can paint a shower drain cover. The easiest shower drain covers to paint are ones made of metal. To do this, you'll need to clean the shower drain and then paint it with a special primer. You will also need to use paint that is formulated to withstand a lot of friction and heavy moisture. In this case, an epoxy-based paint solution would be most recommended.
Wrapping Things Up
We hope that this post has been helpful and illustrating how to paint a shower base. Remember, a paint job is only as good as the preparation work done before the paint is applied. Be sure to thoroughly clean and sand the shower base before using the epoxy solution. And, of course, always fix any damaged areas on the base so that they don't affect the final finish.
Before you go, be sure to check out some of our other posts: