Paint technology has come a long way in recent years; colors are more vibrant, washability has improved, applications are smoother, and primer tints are built into the paint for fewer coats, greater stain-blocking capability, and stronger durability. There are even anti-microbial agents that inhibit the growth of mold and mildew. Not many paint formulas can claim all these qualities; however, Sherwin-Williams Emerald paint brand can. But how do you paint with this line? We've done the research to bring you the answer.
The Sherwin-Williams Emerald paint line carries paint for interiors, exteriors, and even trim enamel to make it easy for a home DIY-er to achieve a rich and luxurious look. Here's how to paint with it:
- Choose your paint color and sheen
- Gather the necessary materials
- Prepare your surface
- Tape the trim
- Paint the wall
- Remove tape
- Clean up
Now that you know the process of painting with Emerald, you'll want to know the details for each step, too. Keep reading as we'll guide you through this exciting project, from start to finish. You'll be admiring your walls in no time at all!

How To Paint With Sherwin-Williams Emerald
Created after five years of research and development, the Emerald paint family is a best-in-class product used by both residential and commercial professionals who take pride in high-end appearances and exceptional durability. Available in matte, satin, and flat, Emerald's advanced stain-blocking technology requires fewer coats for maximum coverage and hides surface imperfections for a remarkable finish.
Now that you have some background on this incredible line of paint, let's discuss in greater detail how to paint with it.
1. Choose your paint color and sheen
You may already have an idea of what hue you want for your walls or perhaps you're at a loss to choose a color. Either way, Sherwin Williams has countless color combinations to narrow your search. You can visit your nearest home improvement store to browse the paint chip aisle and purchase a small sample.
There are also plenty of websites and apps available to help you choose coordinating colors. Snap a picture of your room, upload it, and see how various colors would look on your wall at ColorSnap Visualizer. Or try Explore All Paint Colors, both of which are available via Sherwin-Williams.com.
Next, pick a sheen for your color. Emerald offers three finishes: satin, matte, and flat, all of which are extremely easy to wash and clean should you need to wipe up future spills or splatters.
Does Sherwin-Williams Emerald Need Primer?
Since Emerald paint has combined primer with the paint, there is no need to use a separate primer. This feature is especially helpful as it saves money--no need to purchase an additional can of primer, and saves time. It eliminates the entire process of applying yet another coat of paint.
2. Gather the necessary materials
You'll need:
- 2"-4" angled paintbrush for cutting-in around trim and ceilings
- 9" roller frame and roller cover with a nap of 1/4"
- Painter's tape
- Putty knife
- Paint tray and can of Emerald paint
- Bucket of water with a few drops of dish soap and a sponge
- Drop cloth
Professional painters consistently remind DIYers that high-quality tools will get you the best finish on your walls with the least amount of effort.
3. Prepare your surface
Wash the walls with a sponge and soapy water to remove any dust, dirt, or grime. For stubborn marks or sticky parts, a mixture of water and tri-sodium phosphate (TSP) should do the trick. Wipe walls once more with a dry, lint-free cloth to remove any soap residue. Let the walls dry completely. Meanwhile, remove any outlet covers or light switch plates and use painter's tape to cover the exposed hardware.
4. Tape the trim
Run painter's tape along the top of all baseboard edges and around door and window trim. Ensure a secure bond by using a putty knife, pressing it firmly over the tape to prevent paint from seeping underneath. Some painters lay out a drop cloth and tape its edges to the baseboard, protecting the floor from paint drops.
We may include affiliate links and curated AI content to highlight top design styles.
Click here to see this product on Amazon.
5. Paint the wall
Since you'll be painting in separate batches, now is the time to pour your Emerald paint into a paint tray, grab your paintbrush, and dive in!

Cut-in the edges
"Cut-in" is the term used to describe painting just a few inches at the edges of a wall--at the ceiling, baseboards, and around a door or windows. Most painting professionals recommend this as your first step in painting a wall.

Click here to see this angled paintbrush on Amazon.
Dip your angled brush just an inch or two into the top of the paint; then slowly but steadily run the angled part of the brush against the top edge of the wall, painting as close to the ceiling as possible but without allowing the paint to touch the ceiling. Continue on this way, cutting in about 3"-4" inches around the edges until you reach about 4-5 square feet. At this point, set aside your brush as you'll want to use your roller while the edged paint is still wet.
Using the roller

Gently dip your roller brush into the paint tray and pull it back, repeating this action to absorb more paint until you hear a sticky sound when rolling against the tray. You don't want to submerge the roller into the paint; try to dip only the nap into the paint.

Click here to see this roller cover on Amazon.
Roll the paint on the wall, near the cut-in edging, up and down until you have painted what looks like a "W." Dipping your roller again, fill in all the areas of the "W," overlapping the wet edges of the cut in paint, too. Be ready with a rag or paper towel on hand to immediately wipe away any spills or drops as you go along. Repeat this strategy at a brisk pace until the room is fully painted.
Depending on the surface of your walls, one coat of Emerald paint should suffice and 2 coats at most will be more than enough to cover even the darkest of colors.
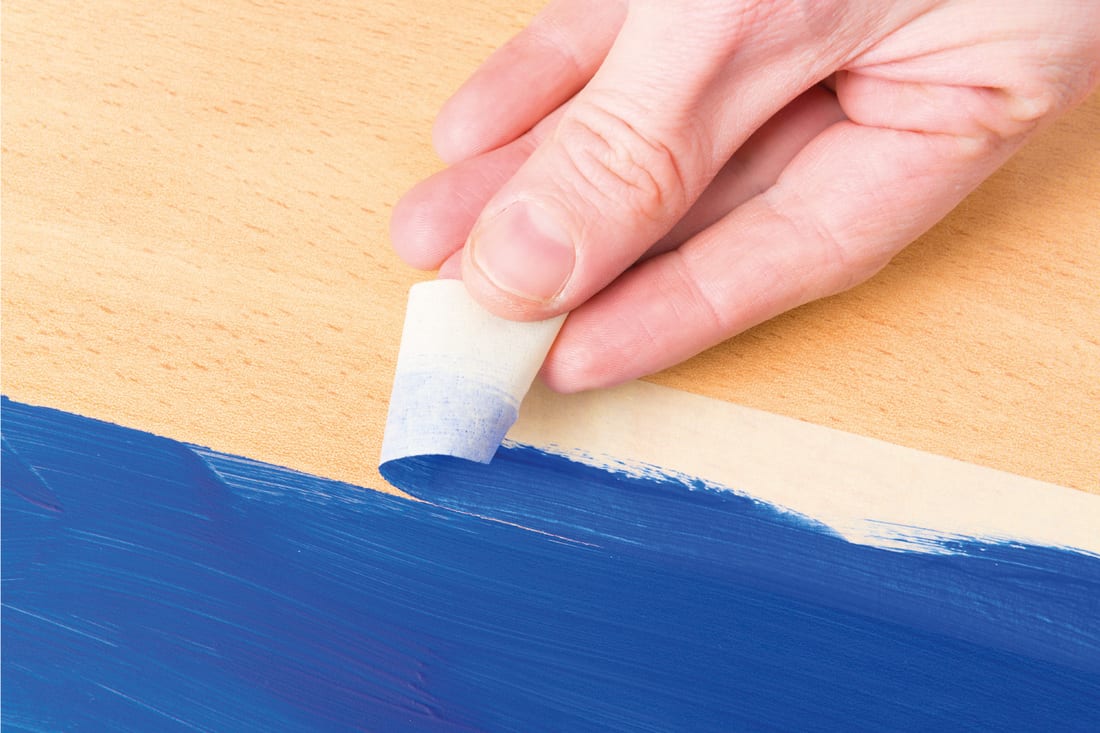
6. Remove the tape
While the paint is still wet, use the putty knife to gently score the tape along the wall and slowly peel the tape back over itself at a 45-degree angle. Use the knife to sever any sticky paint and allow the paint to dry for at least 3 hours. Resist the urge to touch the wall as smudges can disrupt the smooth and even finish you want. And to be on the safe side, wait 24 hours before reattaching outlet covers and lights switch plates.
7. Clean up
It's time to wrap it up! Rinse your brushes and roller cover until the water runs clear, using a mild dish soap if necessary, and set them out to dry. Make sure the paint can's top is either tightly screwed back into place or tapped down with a hammer to keep out any airflow.
You may want to pour a small amount of paint into a small glass or plastic container and store it with a small paintbrush. This way, if somewhere down the line the wall is scratched or needs a little touch-up, you won't have to pull out the heavy paint equipment.
How Long Does It Take For Sherwin-Williams Emerald Paint To Cure?
While paint can be dry to the touch, it doesn't mean it's time to return all frames, pictures, and shelves back to the walls. Paint needs to cure, which is the time it takes for latex paint to fully bond to the surface, harden, and reach its maximum durability. Emerald latex paint typically fully cures within 2-4 weeks.
How Do You Clean Sherwin-Williams Emerald Paint?
Standard paints, especially in a flat sheen, are notorious for being unable to hide or wash away marks. Sherwin-Williams Emerald paint is different and has exceptional washability even in its flat finish. To clean, use a soft cloth or sponge dipped in a mild mixture of soap and water and apply in a circular motion. There is no need to scrub; however, do rinse and wring your cloth or sponge between applications since excess water can warp your walls.
If stubborn spots remain, mix baking soda and water to create a paste and rub it over the problem area. Wipe it clean with a soft, dry cloth.
Click here to see these cleaning cloths on Amazon.
What Is The Coverage Of One Gallon Of Sherwin-Williams Emerald Paint?
A rough estimation is that one gallon of Emerald paint provides coverage for up to 400 square feet, equivalent to a small room or bathroom. Likewise, 2 gallons will cover up to 800 square feet, which is an average-sized room. For a more precise answer, you can enter your room's measurements and take into account doors and windows by visiting the Sherwin-Williams paint calculator.
In Closing
Sherwin-Williams Emerald paint brand demonstrates how far paint engineering has come. With incredible washability and endurance, Emerald paint is sure to provide even, silky-smooth, coverage in whatever color you can imagine.