
Did you get yourself a Ryobi Whole Stud Detector and want to know how to use it? You’ve come to the right place, for we have researched this question, and we have the answer for you.
Using a Ryobi Whole Stud Detector is straightforward, and it can detect studs and/or wiring behind a wall. Calibrate the stud finder before each use by pressing it onto a wall you are sure has no stud. Hold the "on/off" power buttons simultaneously; watch as seven green LED lights come algow and blink several times.
To detect a stud or wire:
- Remove any hanging items from the wall
- Calibrate the stud finder
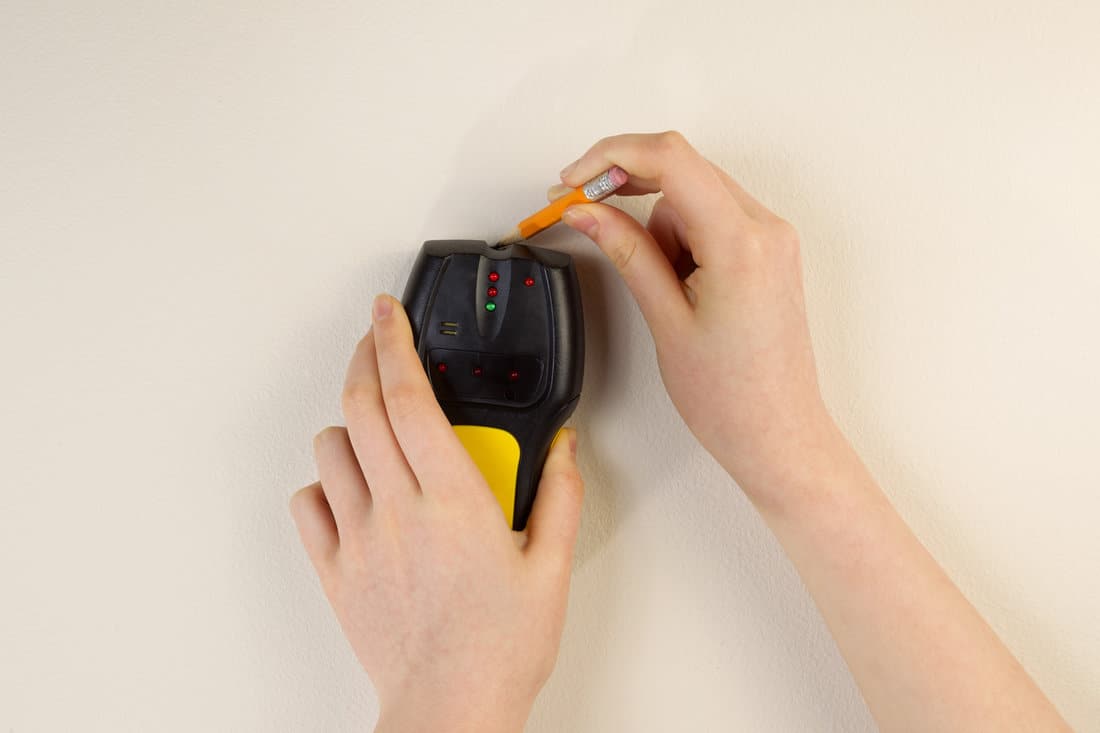
- Hold the stud finder against the wall, exerting gentle pressure. Press "on/off" power buttons simultaneously while slowly moving the device along the wall.
- Watch as LED lights glow when a stud or wire is identified; centering the lit lights will indicate the location of the stud or wire. For stud detection, LEDs glow green. For wire detection, LEDs glow red or orange.
- Deploy a marker onto the wall to indicate the stud or wire location by firmly pressing the central button on the stud finder.
Let’s talk more about the Ryobi Whole Stud Detector in the succeeding sections.
Read on!
What is a stud?
A stud or a wall stud is a vertical framing member that you install in a series on the wall. You install it with a regular space between each one.
The drywall inside your house and the external wall cover the studs and keep them hidden. Installing the drywall involves fastening it to the studs.
Some studs are load-bearing and provide vertical support to the wall. The only purpose of non-load bearing studs is to provide the structure for the walls that divide the spaces of the house.
Finishing The Drywall
Finishing the drywall effectively hides the nails or fasteners. Contractors use drywall paper tape or drywall mesh tape and cover it with a joint compound. The result is a smooth wall that looks like it is a single piece of drywall instead of several panels.
Unfortunately, this also means that you lose any trace of where the studs are located. The nails or fasteners are now buried under the joint compound and drywall tape. Even the small gaps between the drywall sheets are no longer noticeable.
What is a stud finder?
![Digital detector man hand is scanning wall by sensors ProSensor precision stud finder wooden beams - How To Use A Ryobi Stud Finder? [Step By Step Guide]](https://homedecorbliss.com/wp-content/uploads/2022/09/Calibrate-the-stud-finder-and-start-moving-it-across-your-wall-to-find-a-stud..png)
A stud finder (also known as a stud detector) is a device that you can use to locate the position of studs behind the drywall.
How does a stud finder work?
Different stud finder models use different technologies in detecting studs behind the drywall. No single stud finder uses more than one of the technologies below. Each one has a specific level of effectiveness in locating studs.
Magnetic Stud Finders
Some stud finders use magnets to detect studs behind the drywall. The magnetic field of the stud finder identifies the presence of a nail or other ferrous fastener on the wall. Once the magnetic field finds a metal object, it will conclude that behind the metal object is a stud.
However, magnetic stud finders become less useful when the wall has a metal mesh. Moreover, walls that use a non-ferrous fastener will also render a magnetic stud finder less useful.
Electronic Stud Finders
Instead of using magnets, an electronic stud finder has sensors that scan changes in the dielectric constant of the wall. This constant changes as you move the stud finder across the surface of the wall. Once the stud finder moves over a stud, the sensor will get a lower reading.
This sensor can also detect the presence of electrical wiring behind the drywall to prevent accidents.
Versions of an electronic stud finder use two sensors. When the reading of both sensors becomes the same, then the stud finder is over the center of the stud.
Radar Stud Finders
Newer stud finder models make use of radar technology to detect the location of studs. These stud detectors can identify the location of pipes, wires, and studs. They can even detect the movement of rodents behind the wall.
When to use a stud finder?
We sometimes add affiliate links and content that was curated and created by our team with the help of advanced ai tools to help showcase the best design styles.
There are numerous fasteners in the market nowadays that allow you to hang objects of varying weights on drywall. However, you should hang fragile and heavy things—like an 85-inch 8K QLED Smart TV—only on a stud and not just on the drywall, regardless of the fastener that you will use.
This is to ensure that the fragile object is safe from accidentally falling to the floor when the fastener or hanger fails. This is where a stud finder becomes important. You use it to locate a stud on the wall where you plan to hang a heavy object.
Once you locate a stud, you can drill the fastener to the stud to support your heavy object.
How to use a Ryobi Whole Stud Detector?
A Ryobi Whole Stud Detector is an electronic stud finder. It is a multi-function stud finder that can also detect metals and wiring behind the drywall.
The first set of steps below is for using your Ryobi Whole Stud Detector to locate a stud. The second part provides the steps to locate wires on your drywall. This can be very useful so that you can avoid drilling through electrical wires and prevent accidents and unnecessary damage to your house.
Here are the steps on how to use Ryobi Whole Stud Detector to locate a stud behind your drywall.
Locating A Stud Behind The Drywall

Ryobi Whole Stud Detector is available on Amazon through this link.
Preparing The Tool And The Location
1. Make sure that your Ryobi Stud Detector has a working battery. If the remaining charge on the battery is weak, it can negatively affect the effectiveness of the stud detector in locating a stud.
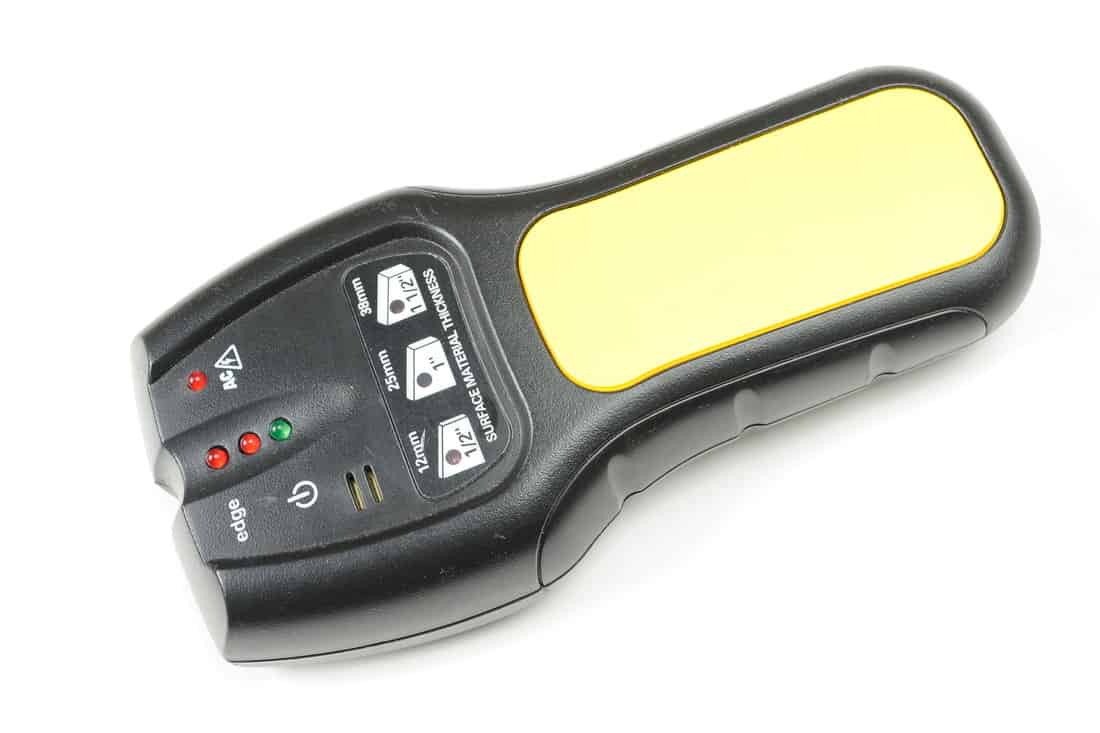
2. Check the stud detector by pressing both "on" and "off" buttons at the bottom of the stud detector. There are two of these gray buttons at the bottom. You need to press both at the same time to turn on the stud detector. All the LED lights on the stud detector should light up brightly. If the LED lights are dim or flickering, you need to replace the battery before you proceed.
3. Remove any items that are hanging on the wall that you will use the stud detector on. You will need to slowly slide the stud detector across the wall while maintaining its contact with the wall. Removing the hanging items on the wall will make sure that you will not accidentally bump into a hanging object and cause it to fall.
Calibrating The Stud Detector
1. Press your Ryobi on the wall that you’re sure doesn’t have a stud behind. This is important since Ryobi is an electronic stud detector, you need to calibrate it first each time you use it. This allows the sensors to adapt to the type of walls that you have, including their thickness and density.
2. Press both power buttons under the Ryobi and hold the buttons. The seven green LED lights on top of the Ryobi will light up at the same time and blink for a few seconds. This is your Ryobi doing its calibration.
Locating A Stud
1. Keep pressing both power buttons and then check the LED lights. If any of the LED lights are on, then the nearest stud is in that direction. However, if none of the LED lights are on, that means you need to slowly move the stud detector in one direction and wait until one of the LED lights on the stud detector lights up.
2. Slowly move the stud detector towards the direction of the LED that is on. Never let go of the power buttons. The number of LED lights that are lit up will increase as you get closer to a stud.
3. The LED lights will manifest the stud's width once the tool starts to move over the stud. Moving the stud finder over the stud will also move the lights of the LED. If you move the tool to the right, the lights will move to the left. This is to show that the stud underneath is moving in that direction because you are moving the stud finder to the right.
Move the stud finder slowly to get the lights on the exact center of the stud finder.
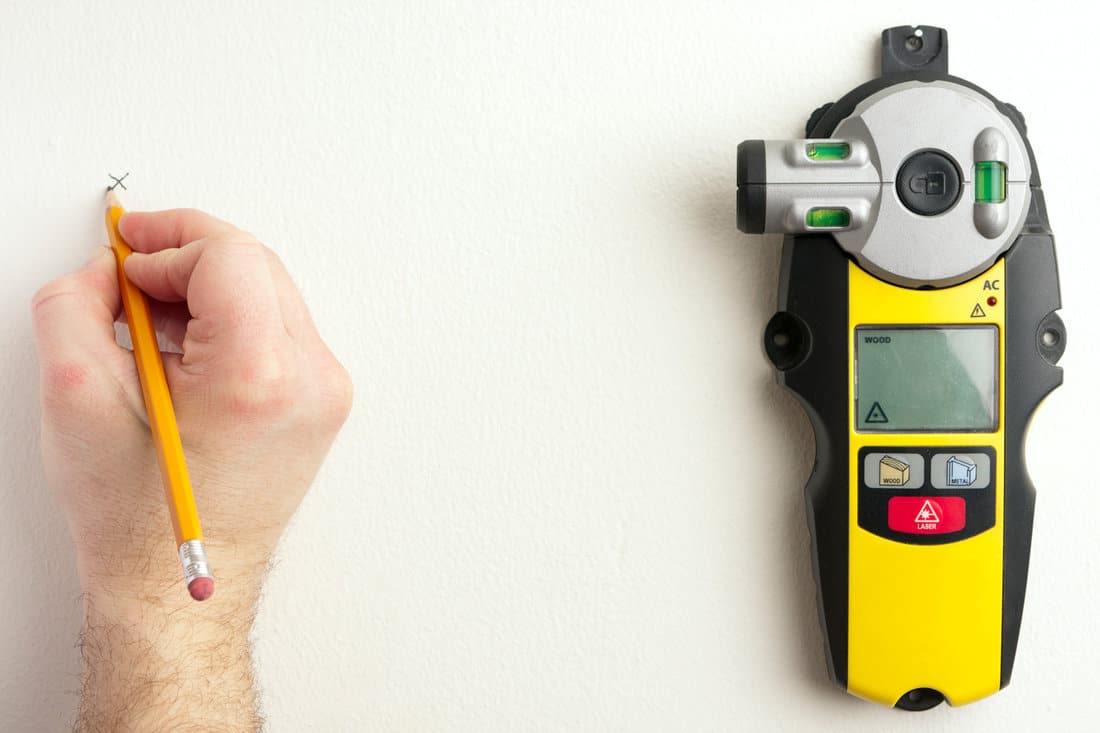
4. Once you have the lights on the center, press the center button with a finger while keeping one of your fingers on one of the power buttons. Pressing the center button will deploy a sharp marker that presses on the drywall.
Remove the stud finder, and you will see the small depression on the wall. This is the center of the stud on your wall. Repeat until you find the studs that you need for hanging your object or appliance.
See the process below:
Locating A Wire Behind The Drywall
Using your Ryobi to locate a wire behind the drywall follows the same process. The only difference is that you need to move your stud detector slowly until the “AC Detection” LED lights up red or orange.
This indicator tells you that you are close to wiring, which can be dangerous if you accidentally hit it with a drill.
Conclusion
The Ryobi Whole Stud Detector is a useful multi-function tool for detecting studs. It also warns you if you’re getting too close to wires to help keep you and your home safe.
If you enjoyed reading this article, you might find the articles below equally enjoyable to read:
Do Blinds Need Drywall Anchors? —Tips For Secure Attachment That Lasts