
Crisscross porch railings are a great way to add visual interest and character to your home's exterior.
They not only serve a functional purpose but also enhance the curb appeal of your property, and adds value to your home.
If you want to add a touch of style to your porch, building your crisscross porch railings is a great DIY project.
Following a step-by-step guide, you can create crisscross porch railings that are both functional and aesthetically pleasing.
Parts of a Porch Railing
Before you start building your porch, you need to learn the parts that you need to work on.
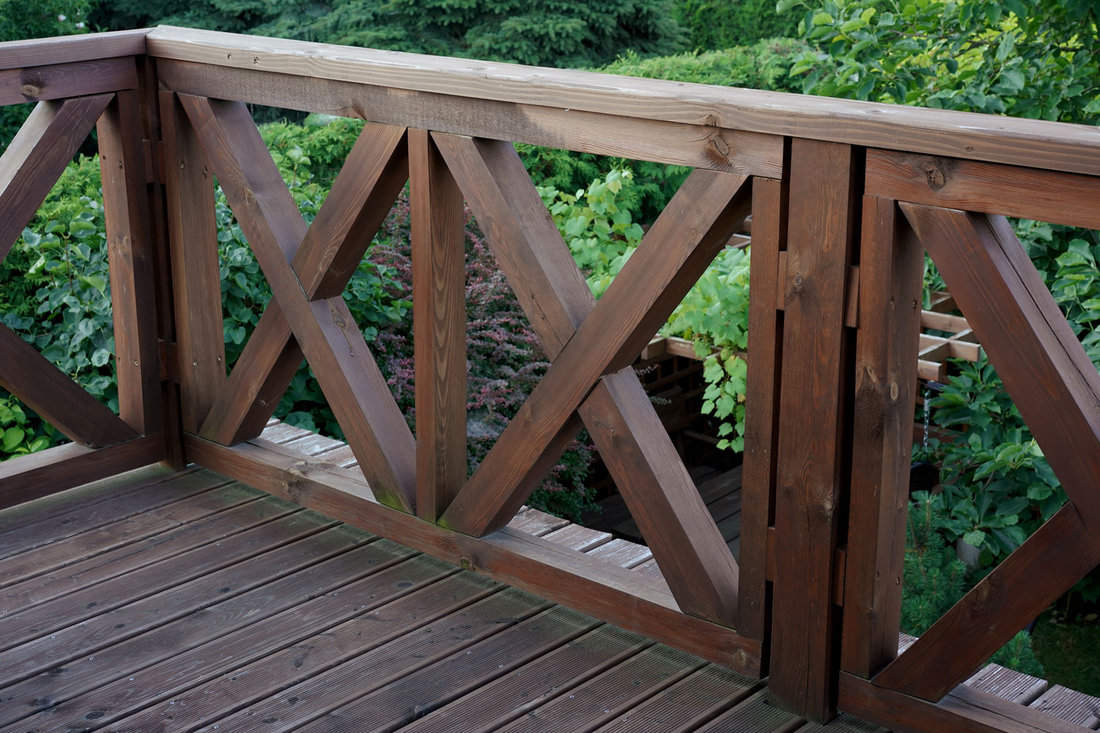
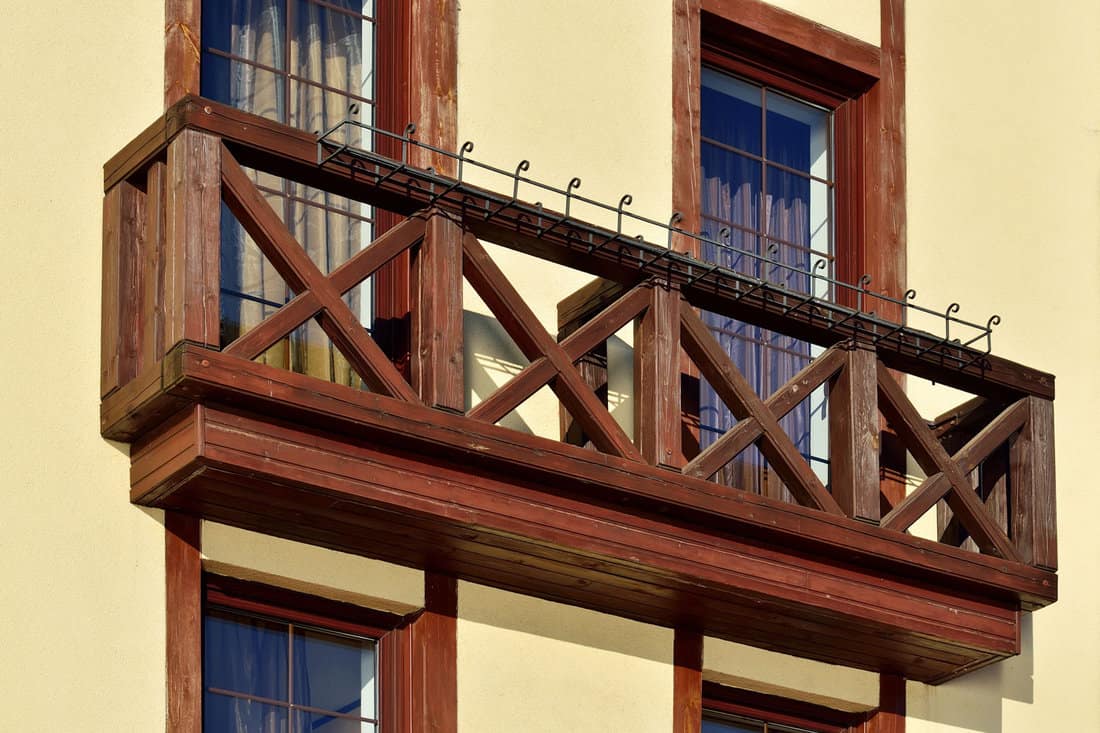
A crisscross porch railing consists of several structural and decorative components that come together to create a distinctive and functional barrier.
Vertical Posts
These are the upright structures that provide the primary support for the railing.
They are anchored to the porch floor and extend vertically to the desired height of the railing.
Top Rail (Handrail)
The top rail, often referred to as the handrail, is the uppermost horizontal component that runs along the length of the railing. It provides a handhold for people using the stairs or standing on the porch.
Bottom Rail
The bottom rail is a horizontal component parallel to the top rail, positioned closer to the floor of the porch. It serves as the base structure to which the crisscross balusters are attached.
Balusters
In a crisscross railing, balusters are the diagonal members that create the crisscross pattern. They are attached at their ends to the top and bottom rails and intersect each other to form an "X" shape.
Step 1: Choosing the Railing Design
When planning to create your own crisscross porch railings, determining the design is an essential step. This will ensure that your porch looks well put together.
First, take the measurements of your porch. Measure the height and width of the area where the railings will be installed.
Then consider how closely spaced you want the crisscross pattern to be. This will help you decide the number of vertical posts and horizontal rails required.
Next, browse through some crisscross porch railing ideas to find inspiration. Take note of any specific elements you'd like to include in your design.
Once you've gathered inspiration, it's time to sketch out your design on paper.
Sketching allows you to visualize the final result, making any necessary adjustments before proceeding with the actual construction.
In your sketch, include details such as the pattern style, spacing, and materials used.
Here are some popular styles to consider:
Modern Farmhouse
Modern farmhouse combines the classic farmhouse style with modern elements, creating a unique and timeless look.
To achieve this style, consider using natural wood materials and adding industrial accents, such as metal railings or light fixtures.
Craftsman
Craftsman style is known for its attention to detail and use of natural materials. This style is characterized by its handcrafted elements and clean lines.
To achieve this look, consider using wood railings with simple geometric shapes and adding decorative brackets or corbels.
Victorian Home
Victorian style is known for its ornate and decorative elements. This style is characterized by its use of intricate detailing and bold colors.
To achieve this look, consider using wrought iron railings with decorative scrolls or adding stained glass accents.
Art Deco
Art Deco style is known for its bold geometric shapes and use of metallic finishes. This style is characterized by its sleek and modern look.
Use metal railings with clean lines and add glass or mirror accents to achieve this look.
Minimalist
The minimalist style is known for its simplicity and clean lines. This style is characterized by its use of neutral colors and minimal decoration.
To achieve this look, consider using metal or glass railings with simple shapes and avoiding any unnecessary decoration.
Step 2: Planning and Preparation
Gather all the necessary materials for a smooth and efficient construction process.
Materials Needed:
Here are the general materials you will need if you're building a standard wooden porch. Take note that these may change depending on the type of design you choose.
Wooden Boards
First, you will need wooden boards for the handrail, balusters, and bottom rail.
Cedar, redwood, or pressure-treated lumber are all suitable choices for this project due to their durability and resistance to rot and pests.
Most rail systems have horizontal top and bottom rails between posts to frame the infill. On wood decks, 2x4s are commonly used for this purpose.
Galvanized Screws
Next, you'll need galvanized screws in different lengths to hold everything together securely.
Shorter screws will be used for attaching the bottom rail to the balusters, while longer ones are used for attaching the top rail to the balusters and the vertical posts.
Wooden Dowels (Optional)
Depending on your chosen porch design, you may need wooden dowels to create the crisscross effect.
Dowels can either be cylindrical, square, or rectangular. These dowels should be cut to the desired length and sanded to ensure smooth edges.
We may include affiliate links and curated AI content to highlight top design styles.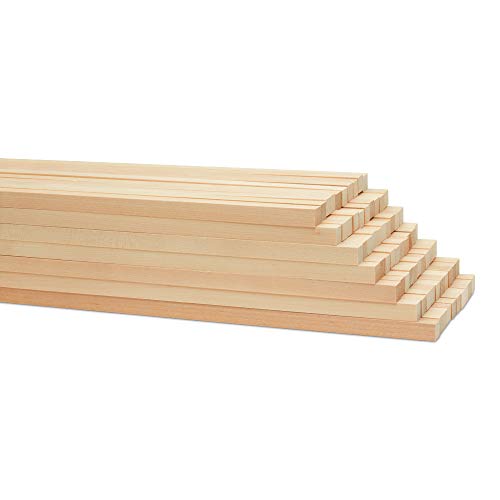
Check out these 48"x1/2" thick square wooden dowel rods on Amazon.
Other Tools You May Need
In addition to the primary materials mentioned above, you will also need a set of tools:
- Measuring tape
- Pencil
- Circular saw
- Miter saw
- Drill with a bit set
- Sandpaper (varying grits)
- Wood glue
- Clamps
As a side note, you may want to read here on how to organize your tools: How To Hang Power Tools On The Wall
Materials for Finishing
Finally, you may want to consider adding finish to your completed railings to protect them from the elements and enhance their appearance.
You can choose from a variety of finishes, such as stains, sealants, or paint, depending on your desired look and the type of wood you are using.
Step 3: Prepare the Work Area
The preparation process can vary depending on whether the railings are installed on a front porch or backyard.
Front Porch
If the railings are being installed on a front porch, the first step is to clear the area of any furniture or clutter.
This will provide a clear workspace and make it easier to move around during the installation process.
It is also important to check the condition of the porch itself. Any loose boards or damaged areas should be repaired before installing the railings.
Backyard
For backyard installations, the area where the railings will be installed should be cleared of debris, including rocks, branches, and other obstacles.
Ground leveling may also be necessary to ensure the railings are installed correctly.
Step 4: Cutting and Assembly
The cutting and measurement process will depend on the type of railing design you have chosen.
1. Cutting the Top and Bottom Rails
The first step is to cut the materials to size. By this time, you should already have your design sketch and measurements. Cut the length of the bottom rails and handrails.
If you are using 2x4s, use a standard saw or a jigsaw power tool to cut the top and bottom rails to the desired length.
Then, cut the vertical posts to the desired height. Take note that the International Residential Code requires that the height of the handrails should not be less than 34 inches and not more than 38 inches high.
Next, cut the baluster parts to the appropriate length based on your design.
2. Assembling the Base Rail
Once the materials are cut, it is time to assemble the rails.
First, lay the bottom or base rail and make sure it is secure.
The process of securing the base rail depends on where your porch is located. It can either be on the ground or in a balcony. Either way, you need to ensure it is stable.
3. Assembling the Vertical Posts
Now, it's time to attach the vertical posts. If your vertical posts are outside mounted, attachment is straightforward and you just need to secure them with screws.
If your vertical posts are inside mounted, you should install the rail posts before installing the decking.
Each vertical rail post should have a distance of at least 4 feet and no more than 8 feet apart.
4. Assembling the Top and Bottom Rail
Place the top and bottom rail between the posts and secure it in place.
Make sure there is a 3 1/2 inch sweep space between the floor and bottom of the panel.
You may need to screw them diagonally using 3-inch trim screws to attach the railings. Repeat this process for each section of the railing.
Below is a very helpful video on how to assemble the foundations of your porch.
3. Creating the Balusters with Crisscross Patterns
To create the crisscross pattern, there are several techniques to try depending on the type of baluster design you chose.
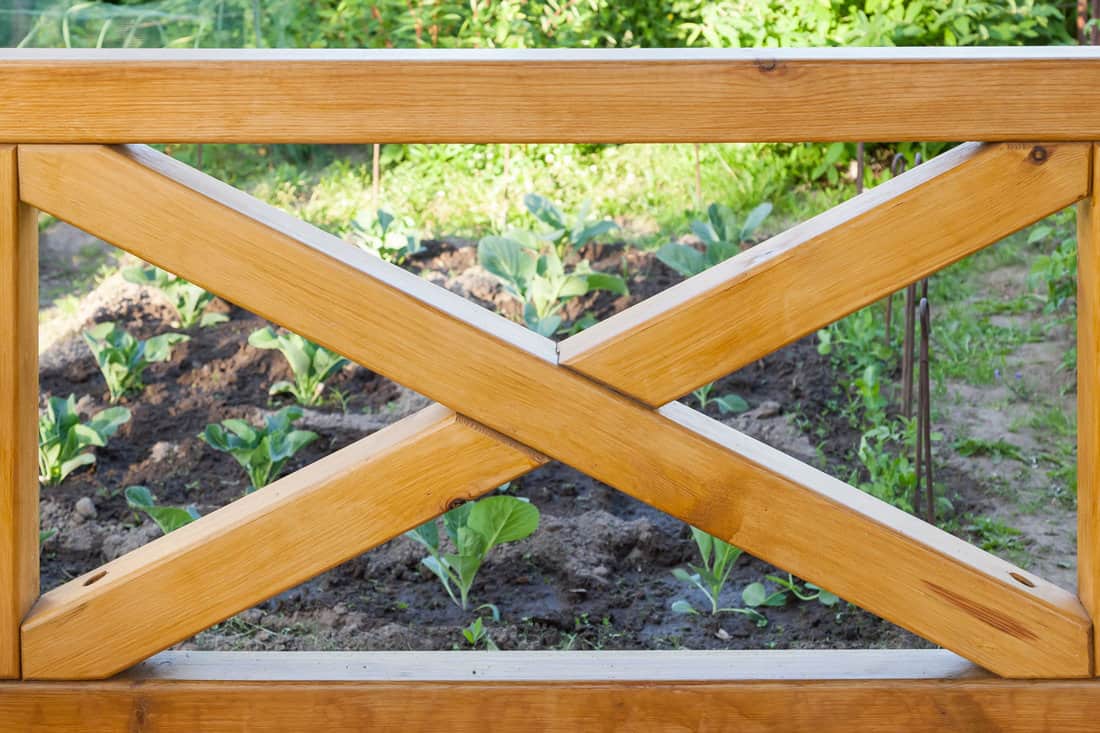
Cross Halving Joint Technique
When creating crisscross patterns, a good woodworking technique that you need to learn is how to perfect a cross halving joint.
A cross halving joint is a woodworking technique where two pieces of wood are joined by cutting a notch in each piece that is half the thickness of the wood.
These notches are cut where the pieces intersect so that when the two pieces are fitted together, they create a flush surface at the point of intersection.
The cut-out sections allow the two pieces to cross over each other, with each piece supporting the other, creating a strong and stable joint.
It is a simple yet effective means of connecting pieces where the structural integrity of the joint relies on the snug fit and adhesive.
Although sometimes, additional mechanical fasteners like screws or nails are needed for extra strength.
Watch this video below to learn how to create a cross halving joint.
Farmhouse Style
One of the simplest ways to create a crisscross pattern for balusters is to put two wood boards on top of each other then cut one into sections to intersect with the other.
In this tutorial video below, you will learn how to create a farmhouse-style railing with crisscross pattern.
Although this design is a bit more complex, it shows how to create the crisscross baluster using wooden boards.
Chippendale Style
If you're feeling a bit more adventurous with your crisscross design, you can try the more intricate Chippendale-style porch.
Chippendale style is characterized by its unique pattern within the railing's structure.
Typically, this involves geometric shapes, such as lattices or fretwork, and sometimes more complex designs that resemble interlocking ribbons or lines, forming a series of shapes like diamonds or parallelograms.
The intricate patterns are often laid out within a framed grid and used as the balustrade section of the porch.
Here's a video of a great project on how to cut, measure, and assemble a Chippendale railing design.
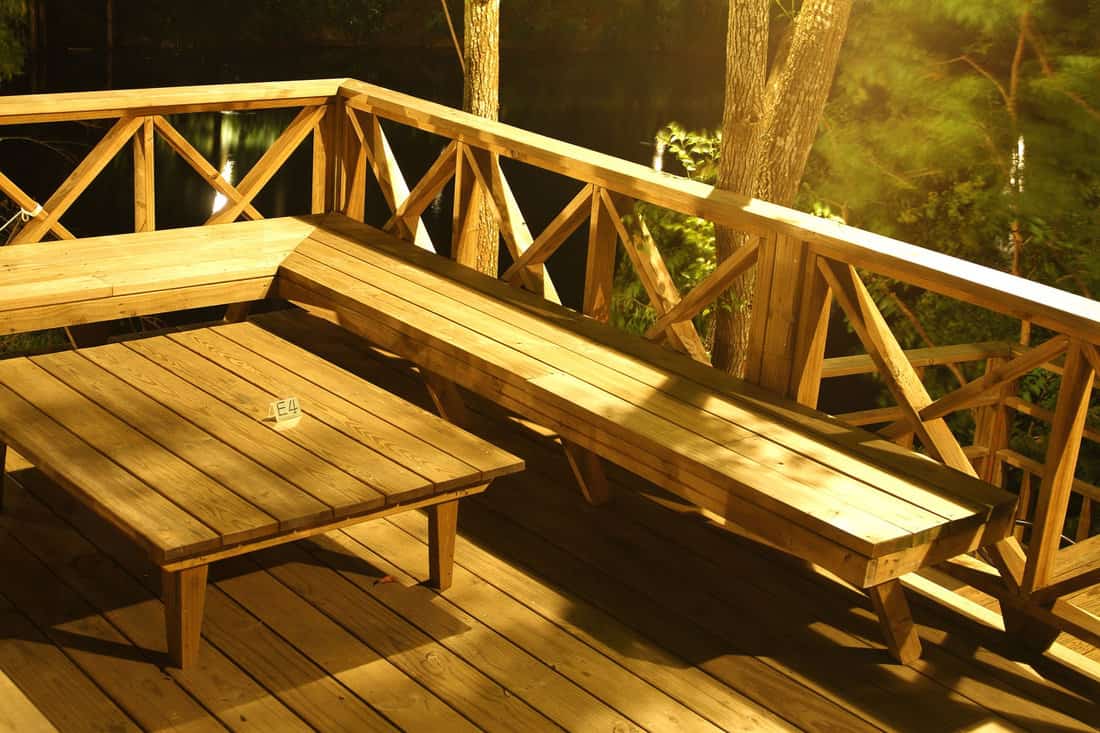
The Importance of Porch Railings
Porch railings are essential to any porch, providing safety, security, and aesthetic appeal.
They come in various styles, designs, and materials, including wood, metal, vinyl, and composite.
The primary function of porch railings is to prevent people from falling off the porch, especially young children and the elderly.
They also serve as a barrier, keeping animals and objects from exiting the porch.
Porch railings can also enhance the porch's appearance, adding a decorative touch that complements the house's overall design.
When selecting porch railings, it is important to consider the style, design, and material that best suits the porch and the house.
The porch railings' style and design should match the house's architectural style, while the material should be durable, long-lasting, and low maintenance.
Wood is popular for porch railings due to its natural beauty and versatility. However, it requires regular maintenance, such as painting, staining, and sealing, to protect it from the elements.
Metal porch railings, such as wrought iron or aluminum, are durable and long-lasting but expensive.
Vinyl and composite porch railings are low-maintenance and affordable but may not have the same aesthetic appeal as wood or metal.
Installing porch railings requires careful planning and execution to ensure they are secure and stable.
Adhering to Building Codes
When building crisscross porch railings, it is crucial to adhere to building codes to ensure the structure is safe and up to standard.
Building codes vary by location, so you must check with the local building department to determine the specific regulations for your area.
Some standard building codes that may apply to crisscross porch railings include:
Height
The railing height must be at least 34 to 48 inches for residential buildings and 42 inches for commercial buildings.
Spacing
The spacing between the balusters or pickets must at least 4 inches or less to prevent small children from getting stuck between them.
Load-bearing Capacity
The railing must withstand a certain amount of force, typically 50 pounds per square foot, to ensure that it can support the weight of people leaning against it.
Handrail requirements
Handrails on stairs must have a minimum diameter of 1.25 inches and a maximum diameter of 2.25 inches.
It is important to note that these are just a few examples of building codes that may apply to crisscross porch railings.
Check with your local building department to determine the specific codes for your area.
These codes ensure that the structure is safe and up to standard. Failure to adhere to building codes can result in fines and even legal action.
It is important to remember that safety should always come first when undertaking any DIY project.
Wear appropriate safety gear, such as gloves and eye protection, and take all necessary precautions when using power tools or handling materials.
Wrapping Up Your Porch Railing Project
As you look upon your finished work, take pride in the beauty and functionality you've added to your home's exterior.
It enhances the visual appeal, and a well-built railing ensures safety for everyone on your porch.
Patience, preparation, and suitable materials are the keys to any successful DIY endeavor.
And if ever in doubt, seeking advice or referring back to guides like this can always set you on the right track.
Your porch is often visitors' first impression of your home, so make it count.

I WISH this were a step-by-step guide. What’s missing is the technique for measuring and cutting the angles for the tops and bottoms of the criss-cross.
Hi Richard! Thanks for the feedback. We have updated this post.