Quikrete Epoxy Concrete Repair is a versatile and efficient solution for fixing cracks and other issues in your concrete surfaces.
This user-friendly product is designed to make the repair process as simple and effective as possible.
By using Quikrete Epoxy Concrete Repair, you'll be able to restore your concrete surfaces and prevent further damage, ultimately saving you both time and money.
What is Quikrete Epoxy Concrete Repair
Quikrete Epoxy Concrete Repair is a two-component epoxy resin system that provides strong adhesion and excellent durability.
It is specially designed for repairing damaged or cracked concrete surfaces.
The product ensures that the repaired concrete not only looks great but also stands up to the test of time.
With its easy-to-use formula, you can quickly restore the integrity and appearance of your concrete surfaces.
Moreover, this product is suitable for both indoor and outdoor applications, making it a go-to choice for all your concrete repair needs.
To achieve the best results using Quikrete Epoxy Concrete Repair, it's essential to follow the correct steps and techniques.

We may include affiliate links and curated AI content to highlight top design styles.
Check out this Quikrete grey concrete sealer on Amazon.
Preparation Before Using Quikrete Epoxy
Before diving into using Quikrete Epoxy Concrete Repair, it's important to prepare the repair area and gather all required materials.
Clean the Area
First, clean the area that needs repair. Remove any dirt, debris, or loose concrete pieces by sweeping or using a vacuum cleaner.
This will help the epoxy to adhere properly and create a strong bond with the existing concrete.
Inspect and Assess
Next, inspect and assess the damage. Evaluate the size and depth of cracks and determine if Quikrete Epoxy Concrete Repair is the right choice for your repair needs.
If the cracks or damage are extensive, you might need to explore alternative repair methods or consult with a professional.
Prepare the Materials and Work Area
After inspecting the repair area, gather all necessary materials. You'll need the following items:
- Quikrete Epoxy Concrete Repair kit
- A clean mixing container
- A stirring stick or mixing paddle (for use with a power drill)
- Rubber gloves and safety glasses for protection
- A trowel or putty knife for application
- A clean cloth or sponge, and water for clean-up
Remember to also read the manufacturer's instructions provided with the Quikrete Epoxy Concrete Repair kit.
This ensures that you understand the proper mixing ratios and application techniques.
Lastly, prepare the work area by laying down a drop cloth or plastic sheet to protect the surrounding surfaces from accidental spills or drips.
Step By Step Guide to Using Quikrete Epoxy
To make the most out of your Quikrete Epoxy Concrete Repair project, follow these easy steps.
1. Prepare the Surface
Before applying the epoxy, ensure that the concrete surface is clean, dry, and free of dirt or debris. You can use a wire brush or a power washer to clean the area properly.
2. Mix the Epoxy Components
For best results, plan your work to use up an entire cartridge at once without stopping. This will prevent the epoxy from setting inside the mixing nozzle.
- Take off the plastic cap and remove the plug from the cartridge's threaded end.
- Fix the mixing nozzle onto the cartridge.
- Insert the cartridge into a 10 fl oz (295 mL) caulking gun. Make sure to use a heavy-duty professional-grade caulking gun.
- Start dispensing a small amount until the epoxy reaches a consistent gray color without any streaks.
Note: If there's leftover material in the cartridge after your task, darefully reseal it using the plug and cap and store for a short time.
When ready to use again, forgo the nozzle. Dispense equal amounts of the white and dark gray components into a throwaway container.
Mix thoroughly using a flat disposable tool (like a paint stirrer or plastic knife) until the color is uniformly gray. Use the same tool to apply the mixed epoxy.
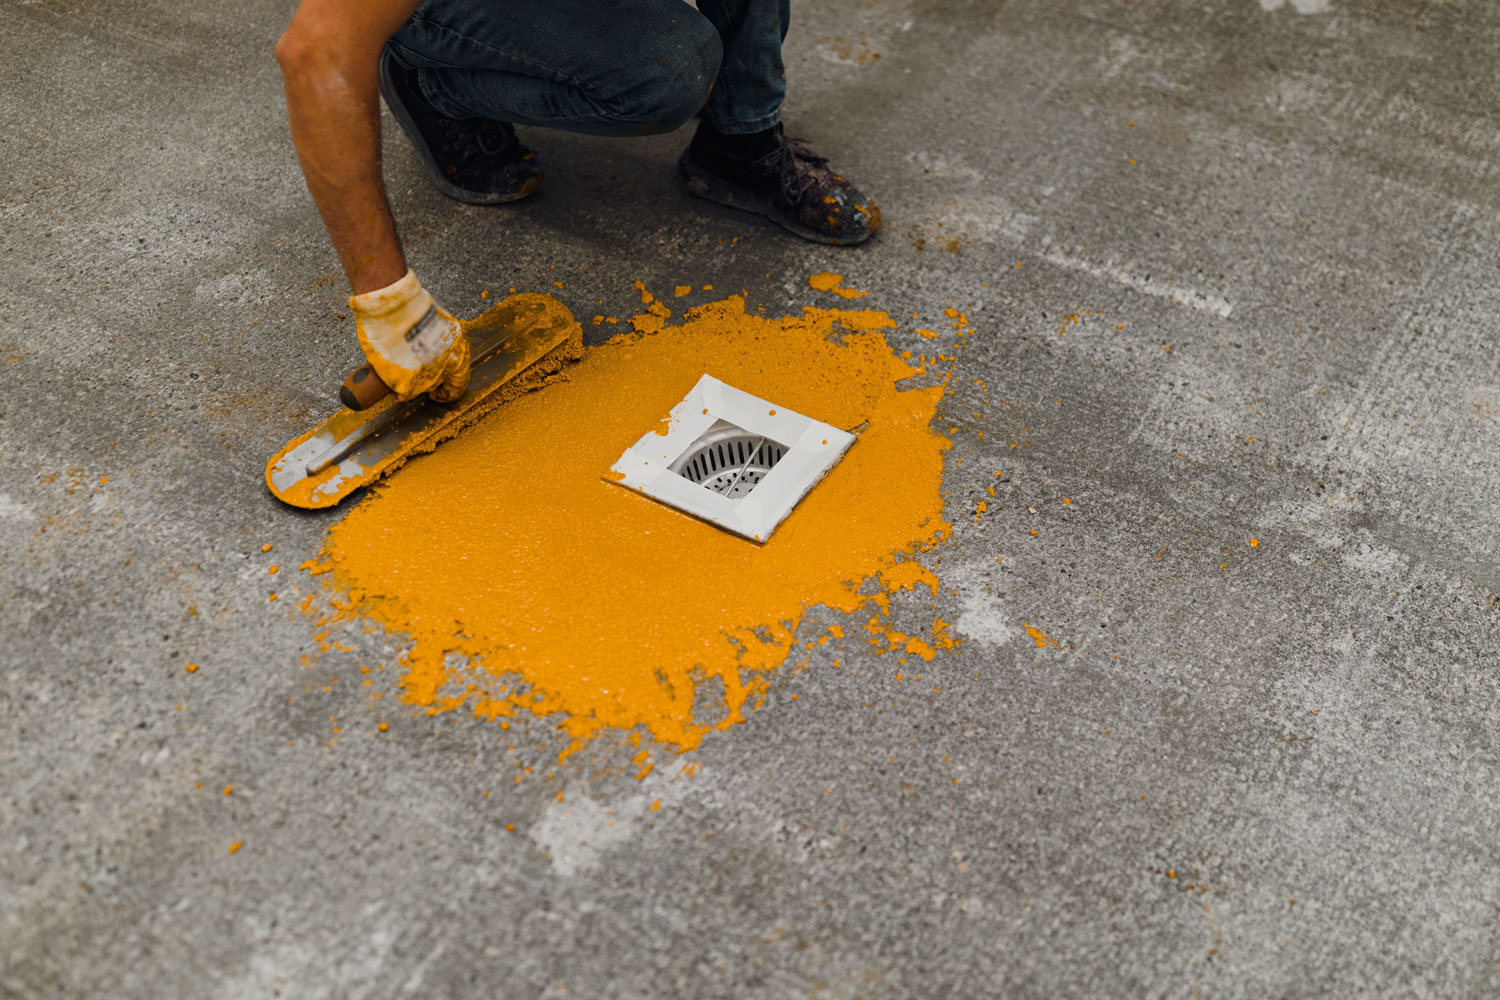
3. Apply the Mixed Epoxy
Apply the well-mixed adhesive to one of the surfaces you wish to bond.
For larger repair pieces that might be tricky to hold in place, consider using temporary mechanical fasteners.
These will ensure the repair piece remains stationary until the adhesive sets, which takes at least 3 hours at 75ºF (24ºC).
Remember, colder conditions will extend the cure time, while warmer conditions will reduce it.
For mending surface defects in concrete, overfill the damaged area with the adhesive, then use a trowel to smooth it out level with the surface.
To dispense all the adhesive from the cartridge, press the plunger halfway.
A few precautions:
- Always use a fresh nozzle; they're not meant for reuse.
- If the mixing nozzle hardens with adhesive inside, don't force it out.
4. Allow the Epoxy to Cure
Give the epoxy ample time to harden and cure. The curing time may vary depending on factors like temperature and humidity. Refer to the product's instructions for the recommended curing time.
Safety Measures
When you're using Quikrete Epoxy Concrete Repair, it's important to consider certain safety measures to ensure a smooth and accident-free experience.
Wear Suitable Protective Gear
Before you begin, make sure you're wearing the proper attire to protect yourself from any potential harm.
Put on safety goggles, gloves, and a long-sleeved shirt to shield your eyes, skin, and hands from contact with the epoxy material.
Ventilation is Key
It's crucial to work in a well-ventilated area when handling epoxy concrete repair.
This ensures that any strong odors or fumes are promptly dissipated, reducing the risk of potential respiratory issues or discomfort.
Avoid Contact with Skin or Eyes
Epoxy can be an irritant. If you accidentally get some on your skin, immediately wash the affected area with soap and water.
In case of contact with eyes, rinse them thoroughly with water for at least 15 minutes and seek medical attention if necessary.
Store Epoxy Materials Safely
When you're not using Quikrete Epoxy Concrete Repair, store it in a cool, dry place away from direct sunlight or heat sources.
Keep it out of the reach of children and pets, as ingestion can be hazardous to their health.
Can Quikrete Epoxy Concrete Repair be Applied on Vertical Surfaces?
Yes, Quikrete Epoxy Concrete Repair can be applied to vertical surfaces!
This versatile product is designed to fill cracks, and it works well on both horizontal and vertical surfaces.
Quickrete Epoxy Concrete Repair: Efficient and Effective
Quikrete Epoxy Concrete Repair can be an efficient and effective solution to fixing damaged concrete surfaces.
By following the steps discussed, you can successfully repair your damaged concrete surfaces and restore the functionality of your property.
For more concrete repair tips, read more here:
Can You Epoxy Outdoor Concrete? Transform Your Outdoor Space